


Known network manager bug https://bugs.edge.launchpad.net/ubuntu/+source/network-manager/+bug/284298
Due to a bug if you want to assign a static IP on Ubuntu 8.10 Desktop your setting will be overwritten after the next reboot because of a bug that escaped the Ubuntu team. The bug is annoying and silly that something so basic would escape the development team.
Any way there are two solutions one uses the command line and the second one the GUI.
First Solution
First solution is to get down and dirty with the command line, it takes less than 2 minutes. Edit /etc/network/interfaces and enter the following values.
sudo nano /etc/network/interfaces
# The primary network interface auto eth0 iface eth0 inet static address 192.168.1.3 network 192.168.1.0 netmask 255.255.255.0 broadcast 192.168.1.255 gateway 192.168.1.1
And save it.
Now move on to edit the /etc/resolv.conf. And add the name server.
sudo nano /etc/resolv.conf
nameserver 192.168.1.1
If you don't want to reboot the system restart the networking service instead.
sudo /etc/init.d/networking restart
Second Solution
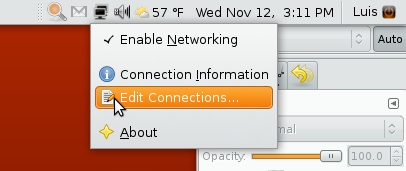
- Right click on the network icon located in the top panel. Select Edit Connections…
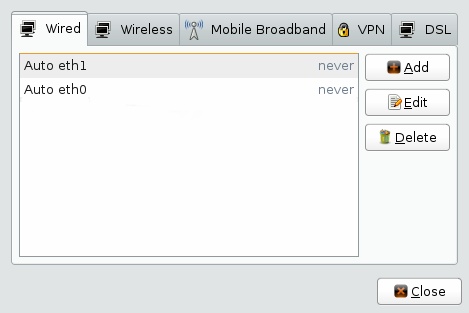
- Right click on Add. This is when we add the new configuration.
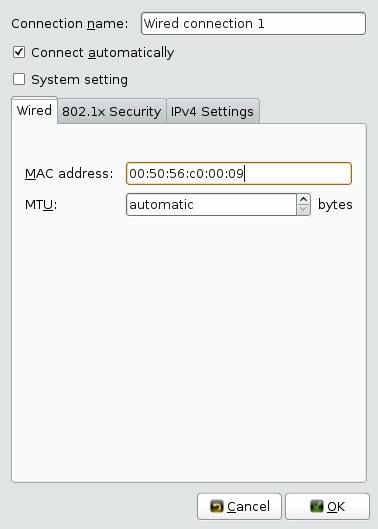
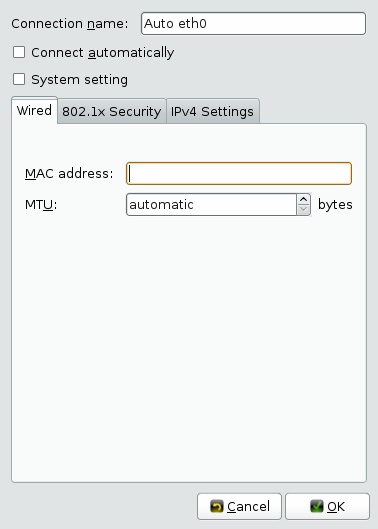
- Now you are presented with empty fields. Check Connect automatically at the top, otherwise the older configuration will take over. For the configuration to work you need to provide the MAC address of your network interface card in my case it's eth0.Tip : Issue ifconfig in the command line and copy and paste the resulting MAC address.
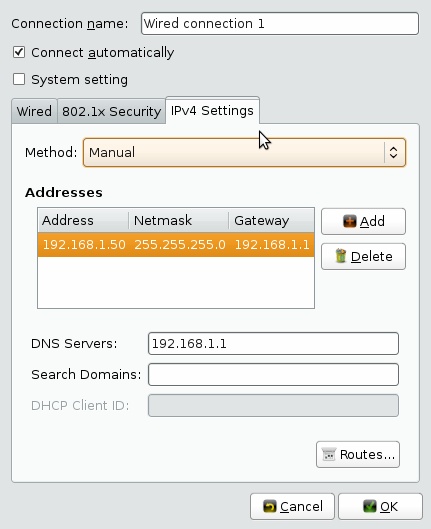
- In the same windows select the IPv4 Setting tab, the drop down menu will offer various option select Manual.
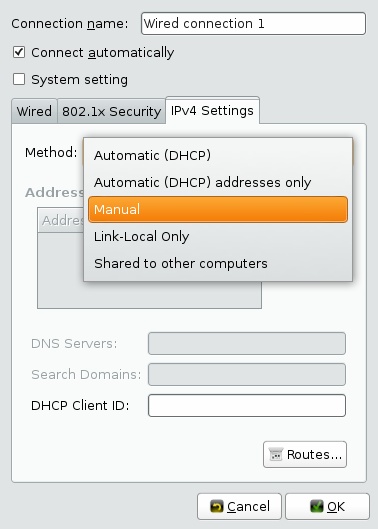
- After selecting Manual you have to provide the IP Address, Netmask, Gateway and DNS Server. Now click OK to save the settings.
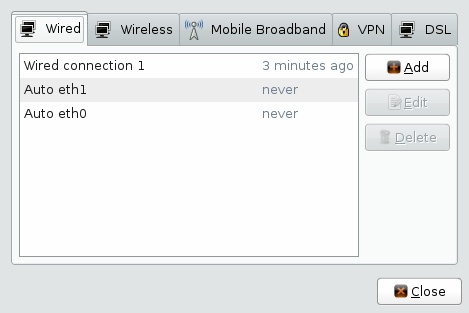
- Now the new connection named "Wired connection 1″ is available.
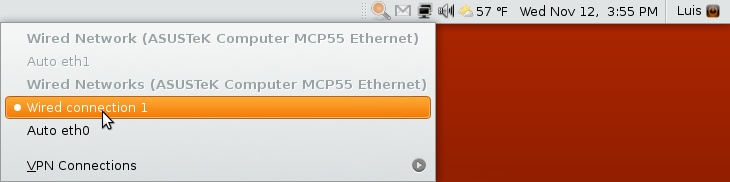
- Go back to the network icon located in the top panel and right click on it. Wired Connection 1 is now an option right click on it. The system will now change from the previous interface configuration the the new one.Tip : To verify the changes issue the ifconfig command.
- The last and perhaps most important step is to go back in to Edit Connections… and unchecked the Connect automatically option on Auto eth0 which is the previous faulty Ubuntu configuration. Failure to do so will result in the Auto eth0 taking over the new configuration on the next reboot.


No comments:
Post a Comment